


A site dedicated to what started out as a Christmas present for my son, and grew into my hobby.
It is a money pit that consumes many hours of weekend and late night building, but all in all is a most challenging and rewarding pastime
© 2013 Withy Grove Junction | Web Master - Ian Sharples


The Origins
Robert, my son, has always been a fan of trains, being weaned on videos of "Thomas The Tank Engine". His great grandfather also built 5" gauge live steam engines. I took him to a model railway exhibition at the Leyland Model Club, where there was a layout by the G-Whizz G Scale Club. He was enthralled by it, (so was I!). I promised him that one day, when I had some spare money I'd buy him a G Scale train.
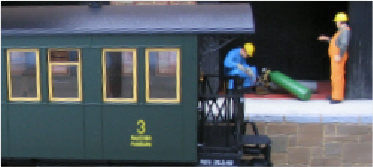
So it being Christmas and all, and also just having changed jobs I found that "What the hell, I'll keep my promise". I went out and bought him the LGB (Lehmann Gross Bahn (Lehmann's Big Train)) starter kit, which consists of a steam loco, a working crane and a flatbed gondola with a truck on top, a 4' diameter circle of track, a 1 Amp, 230 volt transformer / speed controller and a couple of "workmen figures"
The engine has 3 working lights (forward, reverse and cab light), a smoke generator and has an electronic sound module.
A train going round in circles gets a bit boring for a 7 year old and as it's his birthday in January, the ideal presents would be a couple of straights and a set of points. It's at this time I suddenly start finding out what an expensive "hobby" this is! £15 for a 4' straight, £25 for a set of points (electric points sir? No their £35) Hmm...........
Oh well, Grandma's and Granddad's start buying the odd piece of track and it soon mounts up.
Now this is where it gets dicey. The wife starts to complain about having the track laid round the house, kids never tidy up etc, so it's time to broach the subject of "Well we could put the track in the garden?"
So you start measuring and seeing what will go where and how much garden do you "lose" by putting in the railway answer all the questions like "How long will it take?", "How much is going to cost?" "Where will you put my clematis?" etc, etc, etc.
Our garden is about 60' long by about 20' wide. It's not a BIG garden, but it's big compared to the suburban plots that are being built today. There was a "quick" way to claim some space back without losing too much of the lawn. If you look at the picture below you'll see that there are 3 leylandii trees at the bottom of the garden. If they were to be removed this would free up about 96 sq feet of ground. Oh and the retaining wall in front of the trees would have to come down as well.

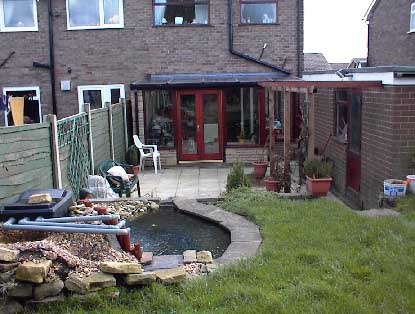

Ignore the state of the pond at this time. I was experimenting with building my own waterfall (It didn't work!), that's why the water is circulating through the plastic plumbing pipes.
Here comes a safety tip.
Each tree was dug out by hand! (Word of warning!) A friend of mine, offered to take them down by chainsaw (he's a landscape gardener). On the first tree he attempted, the saw bounced and went into his leg just below the knee. He was lucky, it took about an eighth off his shin bone and ran round his leg for about 3"). Wear the correct protective clothing. We ended up with a paramedic vehicle and an ambulance blocking the road outside our house, and all the neighbours peering through their net curtains, wondering what accident had befallen me!
Once the trees were taken down, sawn up and disposed of, it was discovered that the wooden fence behind them had rotted and become unusable, so before a new retaining wall could be built the fence had to be replaced (with a concrete one) and then any soil levels had to be remade. The retaining wall wall rebuilt and the soil levels re-instigated.
You'll notice in this picture that the retaining wall had to be built on a slope to match the levels back at the pond.
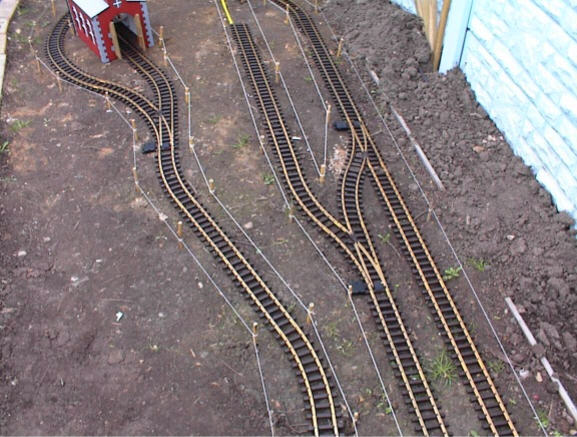
The next job was to get out the track we'd accumulated and see what the deficiency was between what we'd got and what we needed. After measuring up and determining how many curves, straights, points etc, it was a phone call to Arcadia Models in Shaw, in Shaw, near Oldham, Manchester, my nearest large stockist of LGB kit. I rang assuming that for what I needed I would have to order it. NO. Everything was in stock, therefore after a 2 hr round trip and £340 lighter in the pocket enough track was purchased to create an "L shaped oval" which runs around the pond, up the sloping embankment, across the back of the garden, returns back down the slope and back around the pond. After that it was to lay the track in position on top of the soil to work out what went where.
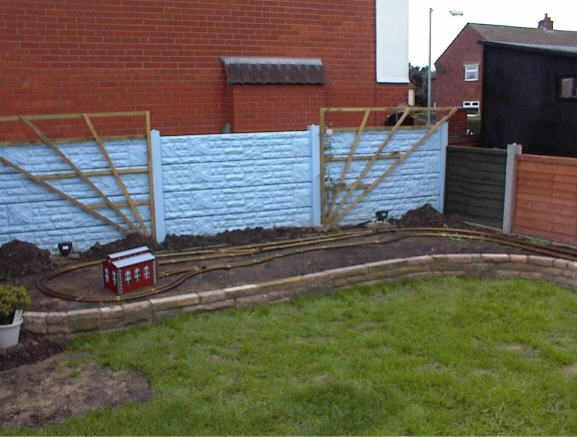
You'll see that I'd marked round the track with pegs and string. I'd decided to fasten the track to a concrete "footing". The reason for this was to get level, stable track with something firm to screw the track to so that it couldn't be easily removed by any light fingered night time visitors!
I lifted the track and dug a trench about 5" deep in between the pegs and string. Seeing as this was freshly re-instigated soil I thought there still might be a bit of movement in it, so I decided to put in steel reinforcing. (Overkill I suppose but if your gonna do a job.........)
A mate of mine does a lot of metalwork and welding commercially, so I discussed it with him and very soon about 120' of 6mm dia steel bar arrived at my house and so did Keith and his arc welder.
He enjoyed welding this up so much, he promised to make something else for the railway. More of which you can see in the "Bridges" section of this web site.
| Origins |